


Minor improvement. Major relief.
We bought one piece of 1x8x8 and one piece of 1x6x8 (I think...this was 3 whole days ago and my memory is totally useless since becoming a Mum.) The mantle is only about 6 1/2 feet long so Joe cut those two boards to the correct length. (The *ahem* not-so-perfectly-square trimmed pieces would later be used as the end caps.)
We used liquid nails along with our trim nailer to secure the two long boards - basically forming an L shape. I didn't take a picture but here's a ridiculously awesome drawing of this step:
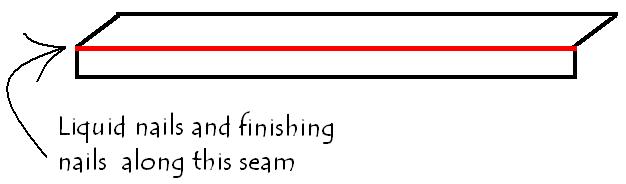
Next, we attached the two end pieces using the same method. I know, it's like rocket science...

After we confirmed our box fit snugly over the mantle and the liquid nails had time to dry, I gave the piece a quick sanding and then stained with what was leftover from the TV stand project.
Two pieces of wood: about $20
Stain (we already had some): free
Total cost of new mantle: about $20
Feel free to break out your calculators and check my math.
Aside from more yard clean up, our next project(s) will be to fix up the mudroom and laundry room - both are slated to be done on the cheap as well. Stay tuned.
Oh...and if anyone has any large, granite stones/blocks they want to get rid of, let us know!
No comments:
Post a Comment
We would love to hear from you!