Tuesday, September 18, 2012

we're still here!

Yes, we are still alive and kicking!  It has been a wonderfully hectic summer!  We've been on a home-projects-hiatus while our bank accounts recoup from the kitchen reno and other small updates we made earlier this year.  We are hoping to start (and finish) a big project over the course of the next month or three which will involve adding a full dormer to the back of our house.  (Hence the need to tighten our boot strings and save up some green!)  We currently have two bedrooms and a bathroom upstairs that we don't use.  Our bedroom and James's bedroom are both downstairs so we have yet to need the upstairs space.  That will all change at the beginning of 2013 when we will welcome baby #2.  (Yep, we have been busy bulking up our bank accounts AND my uterus.)  I hope to share updates and pics of our 2nd floor addition as it moves along!

We haven't completely ignored the homestead this summer though.  Between work, weekend getaways, 3 months of morning sickness, a new nephew and niece, and chasing around a rambunxious toddler, we have chipped away at a few things:

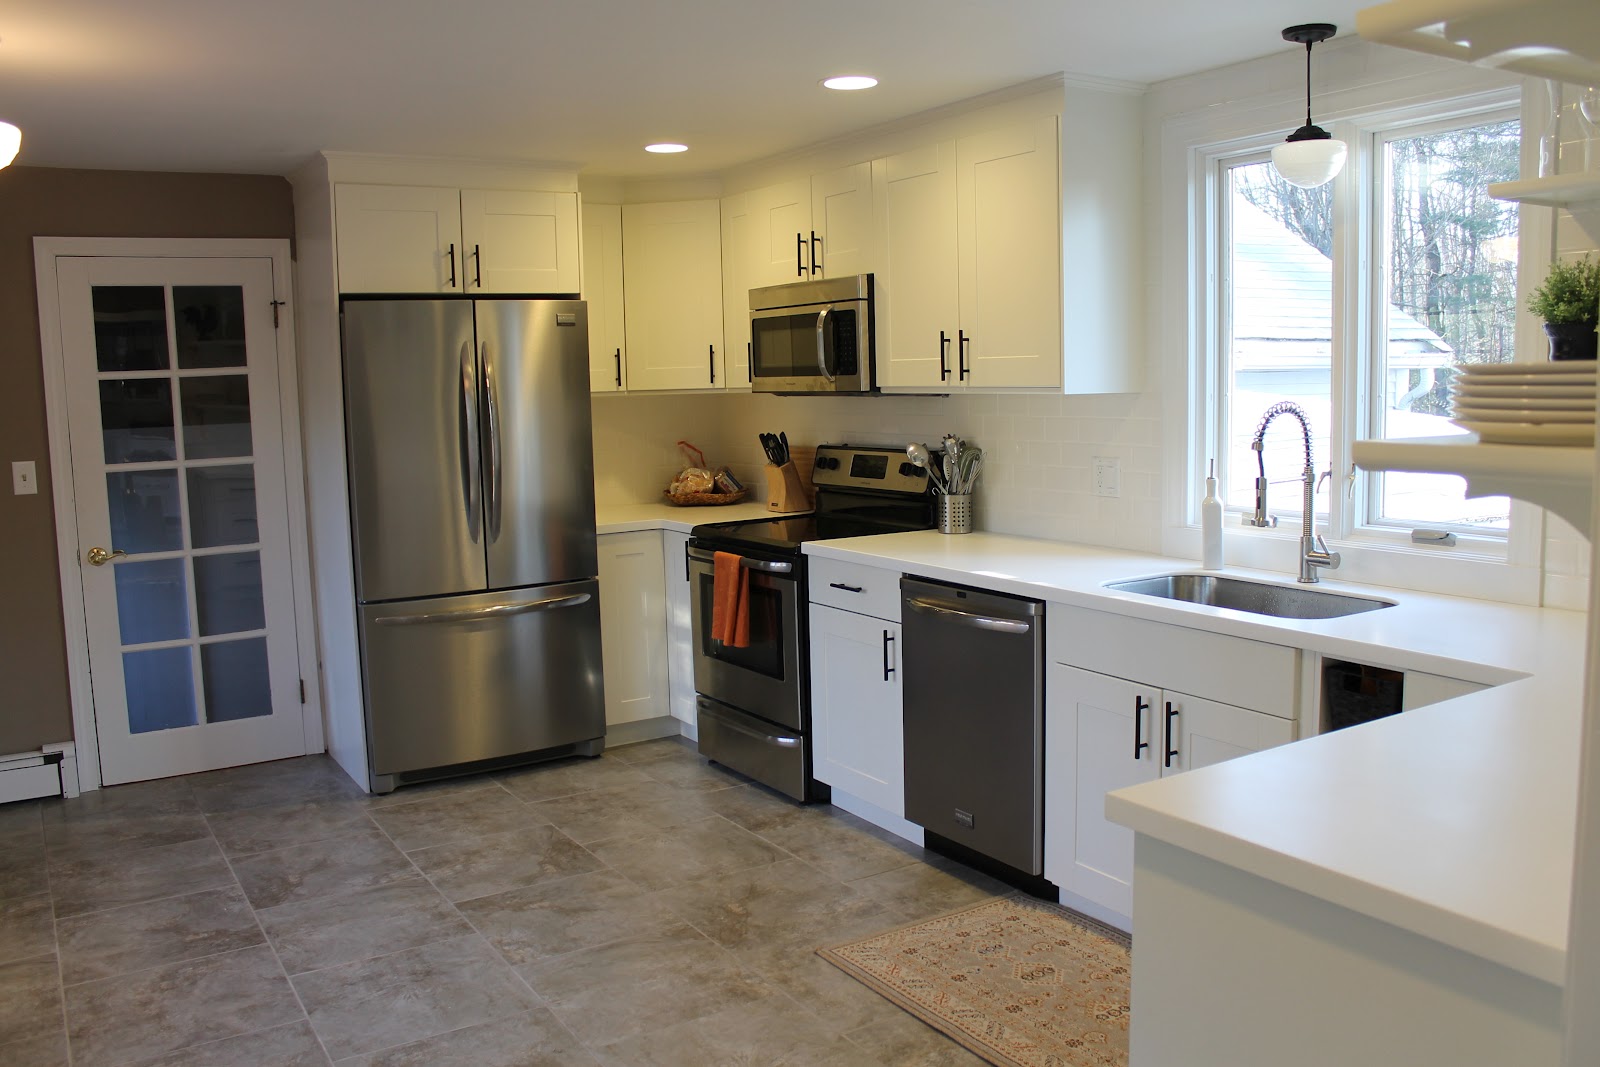
  • We finally got the windows replaced in our kitchen.  Aside from building a window seat, new windows were one of the last things on our kitchen-reno-to-do-list.  I'll try to find some time to upload some pics but they really brighten up the kitchen!

  • After getting a few trees removed, we proceeded to tend to our yard.  I have to admit, it looks like complete crap at the moment.  Our front yard was recently attacked by grubs and we spent last weekend pulling up dead grass and what seemed to be an endless colony of crab grass and other miscellanous weeds.  Joe sprayed the yard down with some evil stuff to kill anything we may have missed and we will try to plant new grass seed this week.  Here's hoping we'll once again see plush green grass in the Spring!

  • Along with de-weeding a lot of our yard, we trimmed back some of the unruly shrubs and planted fall flowers and other perennials that were previously in big planters on our back deck.  Hopefully the mums bloom soon and start to fill out the spaces where we cut back the other shrubs!  We also removed the rotting window boxes that were in front of our kitchen windows and replaced them with cheap plastic ones - that are surprisingly not too tacky!  We might build our own next year but, for now, these will do the trick.

  • We also switched out the lighting in our hallway.  There was previosuly a horrifying gold boob light that was begging to be tossed in the garbage.  We replaced it with a simple track lighting system that brings light down the entire hallway, instead of just in front of the first bedroom door.  I also hung several large picture frames in the hallway that are accented by the adjustable lights.  I have yet to put actual pictures in the frames but, c'mon, one thing at a time!  I mostly have solo shots of James and as much as I love that kid, it might look kind of weird to have 6 huge prints of his mug lining our hallway.  We're not the Kardashians.  Maybe we'll get some family shots during the holidays - or maybe I'll just wait until the new baby arrives.  Actually, I'd prefer to wait until after the new baby arrives AND my face de-swells back to its normal puffiness before I get family pictures printed.

  • I purchased a leather club chair that was super discounted on overstock.com.  We put the chair in the awkward corner next to the door that leads to our back deck.  It's a weird transition space that joins our living room, dining room, and kitchen so it always felt a little bare.  I had planned on putting a desk in that corner but I think I like the simplicity of the chair.  Right now it is just paired with a throw blanket, a small area rug, and a large basket to hold magazines, blankets, toys, etc. but I'm on the look out for a small end table to add to the space.

  • More large frames were also added to this corner above the new leather chair.  No, those ones aren't all empty too!  Well, 2 out of 3 of them are.  I managed to fill one frame with a little 10-minute little craft project I did while watching the Patriots game last weekend.  In short, I cut a "K" out of a diaper box and wrapped it in some fabric I had leftover from our living room curtains.  Toss that in a frame and voila...

  • During those same 10 crafty minutes, I wrangled together a new wreath for our front door.  This was just a plain wreath that I got on sale from Michaels for $4.  I also grabbed a few leaves and berries for about $1 and popped them into the wreath.  No glue or anything needed.  Easy peasy.  I should add that I saw similar pre-made wreaths like this for over $30.  That's just silly.

I think that just about covers what has been going on with our house since my last update.  No major renovations to report (yet) but sometimes that's a good thing!


Wednesday, June 13, 2012

open shelving bandwagon

Shelley over at the House of Smiths is talking about the open shelving craze.  Head over to their page to check out some gorgeous ideas!  We transformed our kitchen earlier this year and are loving our open shelving!  Here is a quick before and after that shows how it really opened up our kitchen...


You can find more pictures of our finished kitchen over in our source list post!

Wednesday, May 2, 2012

tree removal.

Our "tree guys" came this morning and removed two large trees from our yard...


See, you can barely tell that monstrosity was ever even there!


The tree removed from our front yard makes a much bigger impact...


It really opens everything up and makes the front seem so much larger...and also draws more attention to the fact that we have a lot more landscaping to do before it looks acceptable!

They did an amazing job and left no sign that they were even here - expect for the pile of wood chips they left for us in the front yard to use as mulch.

I wasn't here while the trees were removed so I was a little scared to come home from work and see the results.  We are definitely happy and relieved that we don't have to worry about either tree crushing our house every time the wind blows!

Thursday, April 19, 2012

yard tour.

Like I mentioned before, we are slowly chipping away at our jungle of a yard.

Before I get to the to-dos, I will show some that we've already checked off the list...

We installed new lighting around the front of our house.  There were solar lights on clearance at Lowes so we stocked up...


Joe also replaced the light that hangs beside our mudroom door.  I don't have a picture of the old one but let me describe it for you:  it was smaller and uglier.  Here's the new one:


It wasn't 'til I was outside taking pics of the solar lights in action when I noticed the cool glow it gives off...


In non-lighting related news, we removed the messy-looking, dead-leaf-collecting shrubs in our front yard and demolished the rotting retaining wall (which is mostly hidden by the unruly shrubs in the photo below).


You can also see part of a wooden box-type-thingy in the mix up there.  We thought that it was just a decorative way for the previous owners to display their rusty bucket but had a better understanding of it's purpose as soon as we started to tear it out.  You see, our house sits back a bit and is also at a lower elevation from the main road.  Because of this, our sewer system needs a pump to make sure everything makes it up to the main sewer line.  The unattractive contraption hidden under this rotted wood has something to do with that pump.  While sewer systems aren't a big interest of mine, all I needed to know was that we aren't able to remove this thing and had to find another way to hide it (while still being able to access it in case of emergency, prolonged power outage, etc.).  It's about 3 feet across and over a foot high.  We considered one of those fake landscaping rocks but anything that covered this would be way too big - and expensive.  We also thought about re-building a box out of the same landscaping timbers that we used for the retaining wall - and, to be honest, that still might be an option.  For now, we used bricks.  I figured that bricks would match our front walkway, can be easily removed whenever necessary (they are just resting on top of each other and we didn't use any sort of adhesive) AND they wouldn't rot like wood would.   It looks a little unsightly right now but I hope that it won't be as obtrusive once we plant around it.


I guess it would have been nice if I removed that stack of extra bricks sometime in the near future too.  Oh, and we will eventually plant those plants that are just sitting there in their buckets - we're just waiting to get some larger shrubs so we can plot everything out.


Yeh, that's a bird bath on top.  Totally random.  I haven't seen any birds use it yet but James loves splashing around it in.  Gross, I know.  Also, that small bush was originally in our backyard but needed to be removed so we re-planted here instead of throwing it out.  Yay for free stuff!

Speaking of removing plants, we also trimmed the rhododendron brushes in front of our house.  Below is a picture of what they looked like last spring.  It doesn't look so bad this picture but they had become very unsightly since this was taken and blocked most of the front windows.


I say I trimmed them but Joe might say I got a little lopper-happy and hacked the heck out of the poor things.  Whatever.  All of the dead stuff is gone, they don't look like they are eating our house anymore, and if they don't grow back, I will have any excuse to rip them out all together.  All signs point to a win in my book.  (*crazy shadows alert*)


Before heading to the backyard, here's a shot of the large tree that looms over the front of our house...

I'm pretty sure we're going to have this removed.  It isn't in terrible condition but there are several dead limbs and it blocks a lot of the sun from getting to the front of our house - not to mention it would be tragic if even one of the branches were to fall. 


As for the rest of the front yard, we have to clean up the shrubs that line our property, lay new weed blocker, mulch, and hopefully clean out the front corner of our yard that is currently overgrown with briars and other miscellaneous yard waste.  I'm not sure if you can see it in the picture below so I pointed to the bright orange corner flag buried back there marks the corner of our property and also drew some lines to give a rough idea of where our boundaries are.  It would be nice to be able to actually use some of this space...


Our backyard is a much bigger challenge.

Here is a shot of the huge, dead tree that I have referenced numerous times.  This tree is coming down soon now that we got the OK from our neighbors - it's technically on their property.


We spent several weekends last summer clearing out the area around this tree which was filled with vines and briars.  (You can see a picture of what it looked like before we moved in here.)


We also spent a lot of time clearing out the opposite corner of the yard and still have a lot of work to do.  Tearing out briars by hand is a grueling process but it's free and it justifies us swearing as much as possible for an entire afternoon.

There is a random section of fence that will eventually be removed and we are trying to decide if this tree should come down as well.  Once we clear out this section of our property, we plan to install a fence.  Since the fence will sit about 10 feet back from where this one is now, I am thinking that the tree will look weird being in the middle of our yard - and mess with the open flow we're going for.  I should note that we considered just planting a natural fence to line the back side of our property but then concluded that it would be way too hard to maintain and keep all of the vines and briars from attacking whatever we plant back there.  As fences can often be an eye sore, we will plant some attractiveness in front of it to keep it feeling natural and woodsy.  Big dreams.


I drew some arrows pointing to a few flags that mark our back property line and also drew a line to show how much we will need to clear out.   In the end, a new fence will be built along our property line and we will have lovely grass covering all that area that is currently a yard waste graveyard.  Like I said, big dreams.


And for the biggest eye sore of them all...


Yeh, we still have done nothing with the giant sandbox left behind by the pool we removed last year.


We have some huge granite blocks that are just sitting at the end of our driveway and waiting to be moved over here to form a retaining wall/steps that will lead to a stone patio.  


Our imaginary patio will cover less than half of the sandbox so we plan to level out the rest of it and plant grass.  For now, we have a gorgeous old barrel to burn some of all this growth we're ripping out.

Oh, and because nobody has volunteered to come help us with yard work, all of this is probably years away from completion.

xo

Monday, April 9, 2012

kitchen source list

Here's a roundup of where we got everything...


Cabinets:  Adel White, Ikea
Cabinet Hardware:  matte black pulls on sale at Lowes


Sink: Kraus Undermount Sink, Overstock
Faucet: Vigo Stainless Pullout Faucet, Overstock
Rug:  $15 on clearance at TJMaxx (with $5 clearance anti-fatigue mat underneath from Lowes)
Pendant Lights: Schoolhouse Pendant, The Lamp Goods (also on Etsy)
Under Cabinet Lighting:  SuperBright LEDs, http://www.inspiredled.com/


Backsplash:  White subway tile, Lowes
Countertops:  White Corian (the Allen&Roth/Lowes brand)
Shelf materials (brackets, wood, trim): Home Depot


Appliances:  Kitchenaide Gallery, Yale Appliance
Flooring:  Old Madrid 20x20 tile, Best Tile
Under floor heating:  NuHeat, (also purchased through Best Tile)
Wall Paint:  Hot Stone, Valspar/Lowes
Crown Moulding/Shelf/Touch up paint:  custom mix, Sherwin Williams

*Update:  I've had a lot of people ask for the formula for the paint match of the Adel White color.  Here is a bad cell phone picture of our paint label and I will try to take a better picture soon!


All other supplies and accessories were already on hand.

yard plans.

Our past several updates might lead you to believe that we chained ourselves to the kitchen for the past couple months.  While most of our time and energy has been spent inside, we also took advantage of the relatively mild weather to get a jump start on the yard.  We're fairly certain that it will be a few years before our yard is to a point where we are satisfied with its appearance.  Our house is on almost an acre of land and is surrounded by a lot of old trees, vines, briars, and other poorly maintained growth.  Getting rid of all the dead and unwanted growth is extremely time consuming but we're chipping away at it.  We had our land professionally surveyed so we know exactly where our property boundaries are - and know what we need permission to remove! 

We knew that a large pine in our back yard needed to come down when we moved in a year ago.  It isn't ours but would cause major damage to our property if and when it ever falls.  Despite it being on our neighbor's property, we don't expect them to volunteer the funds to remove.  We're willing to eat the costs of removing this tree now as opposed to pay for the damage it might cause in the future.  (We haven't had a chance to discuss with them yet so we're still keeping our fingers crossed that we catch them on a good day and find they are willing to remove for us!) We spent several days last year tearing out the briars that surrounded and wrapped around this tree last year and discovered that it's almost completely hollow - and is very likely to fall on our house with a nice gust of wind. 

We're not even sure our neighbor knows this piece of land is his property.  It appears to have been a dumping ground for yard waste for years.  Once we get permission, we will have this tree removed and proceed with clearing out the growth on our side of the property line.  Our goal to is clear anything off our property and erect a fence that will shield our eyes from all of this ugliness.  We also hope to remove the briars from the side of our yard and replace with some more desirable shrubs - for privacy, aesthetics, to give more space for us to run around, and to eliminate the need to pluck thorns out of our skin should we run too closely to this side of our property.

There's also a huge cherry tree right outside of our front door.  It's not completely dead but it's also not the healthiest looking thing.  We'll probably have this tree removed as well because it offers nothing in terms of privacy, it interrupts the flow of the yard, and it would cause severe damage to the main part of our house if any limbs broke off.  It also blocks sun from reaching the roof and front of the house - allowing snow to build up in winter months and prevents the roof from fully drying after rain (which then leads to mold and a whole other list of issues!).

And here are a few sketches because I'm a visual person and I have to see the whole picture in order to understand each of its parts:

Next weekend's weather forecast looks decent so we welcome you over to help with yard work.  You will be compensated with animal crackers.

Sunday, April 1, 2012

DONE! (For now.)

Yep.  Finally.  Our kitchen is done.  (OK, so we have a few other things to do in this room like replace the three front windows and build a window seat but those will be ongoing projects.)

We finished painting and hanging our shelves...


I also tweaked the small cubbies to the right of the sink.  Instead of 5, there are now 4 cubbies that fit small baskets for storage...


We finished installing and painting the crown moulding...


One project off the to-do list, 37 (and counting) to go!


Wednesday, March 28, 2012

crown moulding

Having the open space between the top of our cabinets and the ceiling irked me almost as much as our pre-tiled walls.  (Sidenote: Yes, a lot of things irk me.  Maybe I'll post a list of all things that irk me but first I should find out how many characters blogspot.com allows per post.)  We didn't want a big piece of ornante moudling to distract from the simple lines of our cabinets so we opted for the simplest pieces of moulding that would fit our space.


First, we needed to devise a way for our moulding to attach to our cabinets.  We don't forsee us ever putting any pressure on the moulding except for the occasional dusting but it still needed to be attached.  To keep from drilling or nailing through our new cabinets, we decided to use epoxy to secure pieces of scrap wood to the top of our cabinets so that the first layer of crown had a place to butt up against.  The wooden blocks were secured to the top of our cabinets 3/4" away from the edge - that way our 3/4" deep moulding would be flush with the front of the cabinet box. Get it?  Since all of that may only make sense in my head, here are our cabinets with the pieces of scrap wood attached:


From there, we took the first layer of moulding and rested that on top and flush with the edge of the cabinets.  (Note:  this first layer is basically just a piece of wood that was 4"tall x 3/4"deep - except it isn't regular wood - it's some kind of composite that was cheaper and lighter than regular wood.)  I used our finish nailer to drive two little nails through the moulding and into the pieces of scrap wood behind it.  Result:  a piece of moulding that is attached to our cabinet that didn't require drilling or nailing through our cabinet.  (OK, to be honest, I did have to nail through our cabinets in two places where the piece of scrap wood didn't completely cure to the top of the cabinet for whatever reason - but I just used a tiny pin nail that you'll never be able to see.)


Don't mind all the junk on the counters - just looking at this picture gives me sweaty palms...


Layer two was less fun.  I consider myself a fairly intelligent person and even majored in math for the majority of my college career - but all of my math skills and logic escaped my brain when trying to cut crown moulding at 9:00pm after an exhausting day.  Several mistakes and test cuts later, I finally figured it out and managed to still have 10 fingers after a long battle with our miter saw.

Because our ceiling isn't completely level, the gap between moulding layer #1 and the ceiling wasn't consistent across the span of our cabinets.  Moulding layer #2 masked this discrepancy.  Once all pieces were cut to size, I again used our finish nailer and pinned these pieces right to the ceiling.


We then filled the few seams so that the cabinets and both layers of moulding looked like a single piece as opposed to 3 separate units stacked together.  We also filled in all of the tiny nail holes.  After giving everything a light sanding, we were ready to paint.

I started to paint a few pieces of moulding before installing but noticed that it got fairly dinged up during the installation process so I skipped the pre-painting step and opted to give everything two clean coats once all pieces were in place.  We still have another coat and some touch ups to do but we're nearly there!


It gives the cabinets a much richer feel and makes the entire room feel so much taller.  Yay for optical illusions!

And for the love of before/progress/after photos:


Remaining to dos:
  • Replace the 3 front-facing windows
  • Construct a window seat/bench along open wall
  • Find fabric and make some curtains
  • Add other decorative touches such as art, a mirror by the back door, hooks, etc?